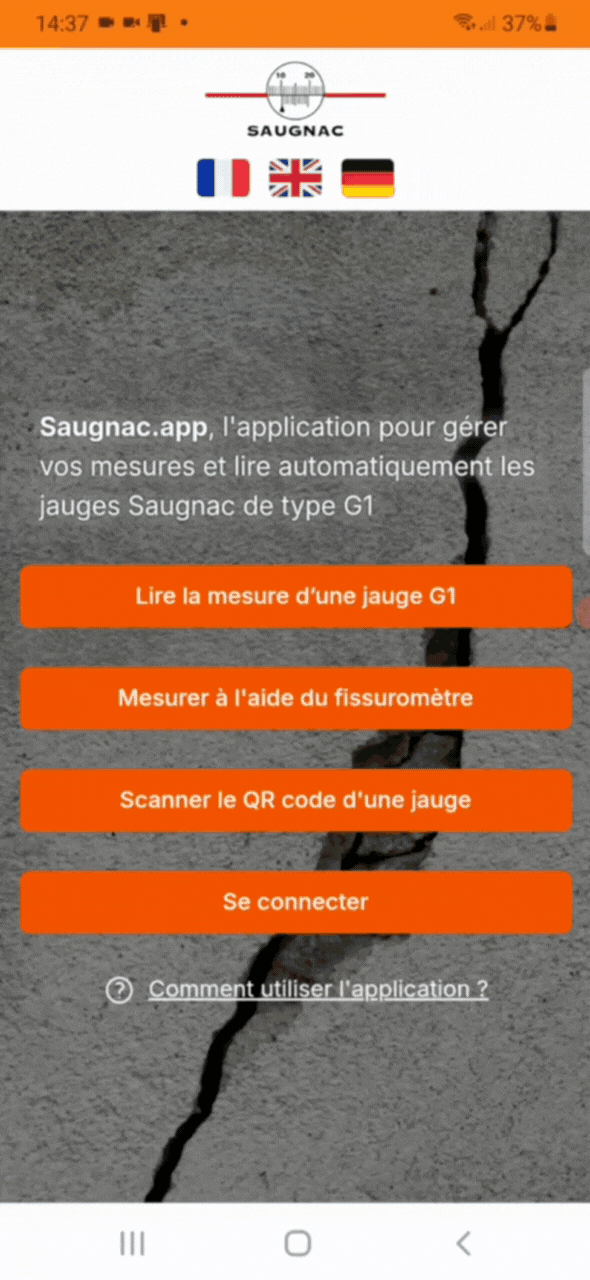
Saugnac.app the application for managing Saugnac gauge measurements

The Saugnac web application, which is completely free with no limitations, is available on PC or smartphone from https://saugnac.app for all new gauges with a QR code. All our gauges are now supplied with a unique QR code.

Identify each gauge and its measurements with its unique QR code
Automatically read the measurements of the G1, G1.1 and G1.2 gauges
Save the measurements in your account
Retrieve temperature and humidity using geolocation
Calculate measurements with temperature expansion
Working together on the same gauge
Managing alert thresholds
Classify the gauges by location and locate them on a map
Download data in Excel format
Automatically display graphics
Share data with others without an account
Access the application from your PC or smartphone
Adding measurements without a connection in offline mode

This application is a service provided with the purchase of Saugnac gauges without any limitation on the number of gauges, users or features! The application only works with Saugnac gauges that have a QR code.

Getting started

Free sign up directly by clicking on the link https://saugnac.app/register
Create a location:

  • Select “My places” in the menu
  • Click on “Add a place” button
Add a gauge :

  • Select the created place
  • Click on “Add a gauge”
  • Scan the QR code on the gauge or manually enter its ID

Add your first measure

It’s quick and easy! If you have any questions or would like to know more about the features, you can find more information below.

The Saugnac application can be accessed directly by clicking on the link https://saugnac.app. It is possible to simply bookmark this link or install the application to get an icon on your smartphone or PC and better manage the offline mode.

If you are using the Chrome or Edge browser, an “install application” button is visible on the home page or in the menu once logged in

If you are using the Safari browser, go to the browser settings and choose Add to Home Screen

If you are using the Firefox browser, go to the settings and click Install

Although we recommend using the Chrome browser, the application works with all major browsers (Chrome, Safari, Firefox, Edge)

Each gauge is uniquely identified with a QR code and an identifier.

This identification allows you to :

  • retrieve historical data simply by scanning the QR code
  • facilitate collaboration with the possibility of adding measurements on the same gauge by different people

To add a gauge in the application, it will be necessary to either manually add the identifier or scan its QR code.

You can create your account directly by clicking on the registration link. Registration is completely free.

It is also possible to go to the home page of the application https://saugnac.app, then click on “Manage your measurements”. Then a link “No account yet? Create one” to access the registration form.

You fill in the form with the required information (Email, First name, Last name, Password, phone number and company are optional) and validate by clicking on “register”. Your account is now created!

Only gauges with a QR code can be added in the application. It is possible to add a gauge to your space in two ways:

1.1. either by scanning the QR code of the gauge directly with your smartphone

To scan the QR code, you can use your usual QR code scanning application. If you do not have an application, simply go to https://saugnac.app (or open the application if you have already downloaded it), and click on the button “Scan the QR code of a gauge” which allows you to scan the QR code directly.

Once the QR code is scanned, the gauge page will load with the measurements already entered and an “add to my space” button is displayed at the end of the page. This button allows you to add the gauge to your space.

1.2. or by adding the gauge from the application

It is also possible to add a gauge by going to the “My gauges” menu, you can then click on the “Add a gauge” button located at the bottom of the screen.

Then you have to fill in the gauge ID (example: XLQDKEX). On a smartphone, it is also possible to scan the QR code with the “Read a QR code” button so that the identifier is filled in automatically.

You validate to create the gauge.

2. Fill in the gauge information

Then you just have to indicate:

  • name: name or number of the gauge (by default the unique identifier is proposed but can be modified)
  • gauge type: either the value is already filled in, or you have to choose from the list G1, G1+, G1.1 or G1.2
  • place: each gauge is classified in a place. You can create a new place (see how to create a place)
  • share my measurements: this switch allows you to activate or not the sharing of measurements. The aim is to facilitate collaboration between different people who may be reading or adding data to the same gauge.
  • share my details: this switch allows you to activate or not the sharing of your details (name, first name, email and phone number if given) associated with the measurement. If you are an expert, sharing your contact details will make it easier to contact you. If you do not share your contact details but the measurements, another user will only see anonymous measurements.
  • a photo (optional): it is possible to add a photo of the gauge installation to contextualise the gauge.
  • a comment (optional): it is possible to add any useful information for the monitoring


A place is used to classify gauges to facilitate the classification of gauges and the extraction of data.

The creation of a place can be done from the “My places” menu by clicking on the “add a place” button. It is also possible to create a place when adding a gauge (see how to add a gauge)


To create a place, you need to fill in:

  • a name
  • an address: the address is used to classify the places by map and to facilitate the search. If you activate the geolocation, an address will be automatically proposed. You can search and modify the address as you wish.
  • a photo (optional): it is possible to add a photo to contextualise the place
  • a comment (optional): you can add a comment about the place.


You validate by clicking on “Create this place” and your place is ready to be used

To add a measurement, select the gauge and click on the “add measurement” button.

In order to automatically retrieve the temperature and humidity, the application will ask you to allow geolocation.

You must fill in the following information:

  • date: the current date is set by default. It is possible to choose another date if you wish
  • measurement (in mm): measurement read on the gauge. On a smartphone, it is possible to automatically read the measurement for the G1, G1.1 and G1.2 gauges (see how to automatically read a measurement?)
  • temperature (in °C): automatically filled in according to the geolocation of the phone when the measurement is added. This value can be modified. The temperature is used to adjust the measurement according to the gauge’s expansion coefficient. It is possible to systematically set 0 to ignore it.
  • humidity rate (in %): automatically filled in according to the geolocation of the phone at the time of adding the measurement.
  • photo (optional): it is strongly recommended to add a photo corresponding to the measurement in order to keep a traceability of the measurement. In the case of an automatically read measurement, a photo is automatically added.

You click on the “add” button and your measurement is now saved.

The automatic reading can be done directly by going to the page https://saugnac.app/ without an account by clicking on the button “Read the measurement of a G1 gauge”. NB: the reading can also be done directly when adding a measurement (see how to add a measurement)

The automatic reading requires a relatively recent smartphone with a good quality camera.

The first time you start the automatic reading, you must allow access to your camera.

Gauge autoreading only works on G1, G1.1 and G1.2 gauges.

For the transparent G1.2, auto-reading may not work as well depending on the background and the quality of the camera.

This is an aid to reading and there may be deviations of 0.1mm in reading depending on the position of the phone. Saugnac cannot be held responsible for any reading errors.

Advice on positioning 

The entire measurement scale numbered from -5 to +35 and the QR code must be in the clear detection zone.

You should not be too close to the gauge (about 10cm). Move back if necessary to facilitate reading.

It is possible to read a gauge positioned vertically or upside down without turning the phone. The same rules apply: the scale must be completely within the reading square.

If your smartphone has several cameras and the default one is not suitable (e.g. wide angle camera), you can change it if necessary by clicking on the button with the double arrows.
If there is not enough light, the flash can be activated by clicking on the button with the flash.
To stop the automatic reading process, click on the cross.

The camera switching and flash activation features may not be active on some phones.

Once the reading is taken by the application, the result of the measurement appears on the screen along with a button to validate the measurement and save it.

If the gauge is already present in your space, the new measurement will be added with the photo taken automatically as well as the temperature and humidity level.

Otherwise it will be possible to add the gauge and the associated measurement.

To modify a measurement, click on the “pencil” icon. This icon is only visible for the measurements of which you are the owner (it is not possible to modify the measurements of another user, you can only hide them)

You then have access to all the data (date, measurement, temperature and humidity) which you can adjust. You then have to validate the modifications on the “validate” button

It is possible to see the measurements of other users if they have chosen to share their measurements.

When the gauge is created, each user chooses whether to share their measurements nominally or anonymously (see how to add a gauge). It is possible to change this setting later.

If the user has shared the measurements by name, a “user” icon appears on the smartphone. It is possible to identify the person (name, first name, email, phone and company if given) by clicking on the icon. On a tablet or PC, the name appears directly.

If the user wished to remain anonymous, a “hidden” user icon appears and it is not possible to know who performed the measurement.

In case some users have added measurements that you are not interested in (or that you think are wrong), or if you want to exclude one of your measurements, it is possible to hide them by clicking on the icon with a crossed-out eye

After clicking on the crossed out eye, the measure remains visible in grey. Rejected measures are not displayed in the generated graphs, nor in the Excel exports.

It is also possible to click on “hide rejected measures” at the top to stop displaying rejected measures.

The data can be easily exported in Excel format.

To export data from a gauge, go to the gauge and click on the menu in the top right corner with the three dots. A menu appears with the action “Export”.

By clicking on “Export”, it will be possible to choose the format:

  • either an Excel file with only the measurements
  • or a Zip archive with the Excel file and all the time-stamped photos

To export all the data of all the gauges of a place, you have to go to the place that groups all the gauges. In the same way, a menu is accessible at the top right. By clicking on it, a menu is displayed with the action “Export”.

By clicking on “Export”, it will also be possible to choose either only the Excel file or an archive file. The Excel file will contain one tab per gauge and the archive will contain one folder per gauge with all the photos.

It is possible to share data with someone who does not have an account on the application by sending a link that allows access to your information without an account.

To do this, click on the menu at the top right when you are on the gauge whose data you want to share, then click on “Share”.


A window will open with the possibility to directly copy a link to send to the person or to indicate an email address to send an email with the link to access the gauge data.

The link sent allows the person to access all the measurements but also the photo and comments that you may have added on the gauge.

The application allows you to define an alert threshold in the “alert threshold” tab. An alert threshold corresponds to the maximum tolerated deviation upwards or downwards in relation to the initial value.

Example: You set a warning threshold of 0.5mm. The first measurement entered is 11.9mm. Thus all measurements below 11.4mm or above 12.4mm will be identified as alerts.

It is possible to enable email notification to receive an alert when a new measurement that exceeds the defined threshold is added by another user.

The alert threshold is visible on the graph with an upper and lower bound that visually represent the threshold.

On the other hand, on the list of measurements, the values are shown in red with an exclamation mark if they are outside the defined threshold. By clicking on the triangle, it is possible to see the details of the deviation.

The application works partially in offline mode. In case no network is available, a red banner displays “offline” at the top.


In offline mode it is possible to:

  • see all places, gauges, measurements already browsed previously in online mode
  • automatically read a gauge
  • add a measurement but without the automatic collection of temperature and humidity.
    When reconnecting to the network, the red banner changes to a yellow banner with the information “Send pending measurements”. Clicking on the banner will synchronise the measurements that have been added offline.

In “offline” mode it is not possible to :

  • access data (places, measurements, gauges) that have not already been viewed
  • add a place or add a gauge

In case of monitoring in an area with a weak connection, we advise to prepare to load the gauges in advance in the application and then to switch to offline mode in order to avoid that the application tries to pick up a network too weak to load the data correctly.

The search for a gauge (or a place) is done after clicking on “My gauges” in the menu. At the top, in the search bar, it is possible to enter the search. The search is carried out on the gauge name, the identifier and the location.

By default, the data is displayed as a list. To display a graph, simply click on the “Chart” tab next to “List”.

It is possible to display on the graph the curve of the adjusted measurements, the raw measurements, the temperature and the humidity level.

It is possible to adjust the display period: by default all values entered since the beginning are displayed.

To display the gauges on a map, select “My Places” in the menu, then at the top right, change the list mode to map mode.

A map is displayed with all the registered locations. By passing over the point, it is possible to see the name of the place and the number of gauges attached to this place. By clicking on the point, the list of gauges of the place is displayed.


To return to list mode, click again on the list icon at the top right.

The operation of the application requires the unique identification of the gauges which must therefore have a QR code / identifier.