


You want information for
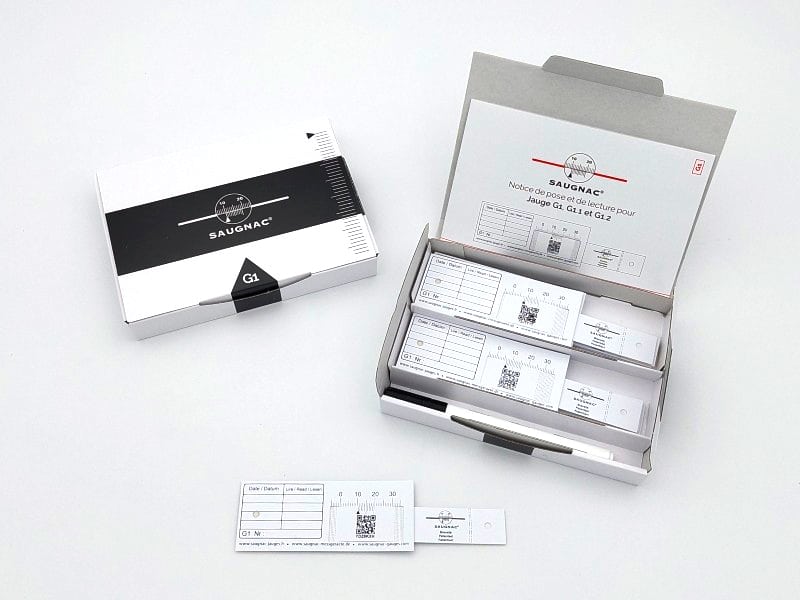
G1 Gauge
If you would like a quotation or have any questions about the product, please contact us:
- by email at info@saugnac-gauges.com
- by telephone on +33 9 62 07 18 68

Technical specifications
| ||||
How to install the G1 crack monitor?Two mounting methods are available:
| ||||
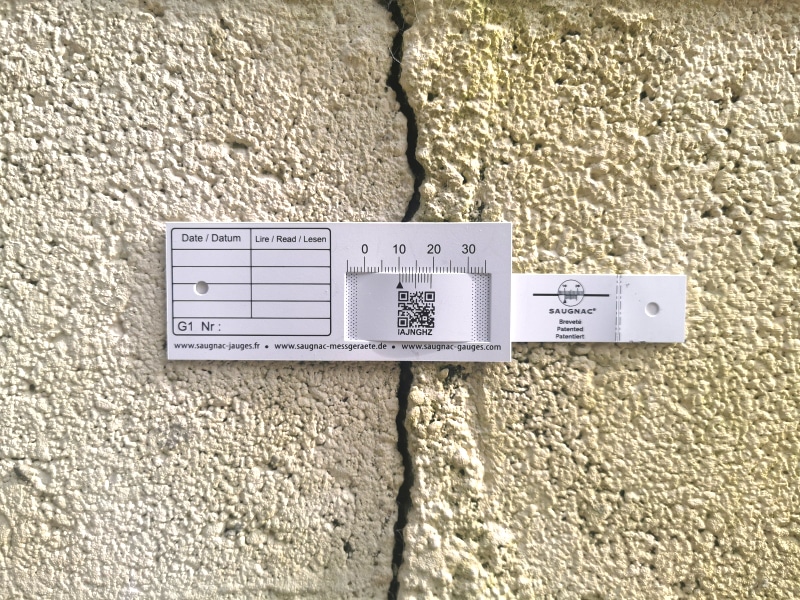
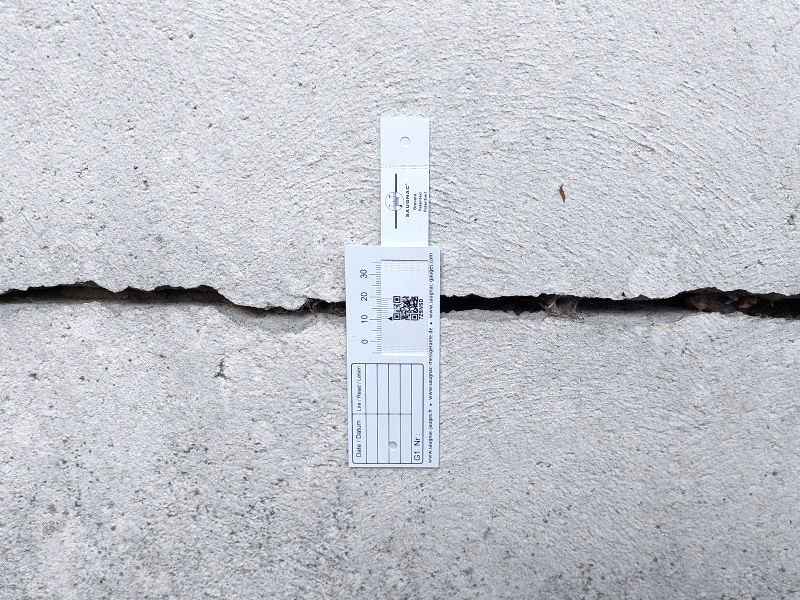
Installation adviceTo measure crack progression most effectively, the gauge should be installed where the crack is widest (typically in the middle). The G1 gauge can be mounted on vertical, horizontal or diagonal cracks. It is placed straddling the crack to measure changes in the opening width. The G1 gauge is made of a flexible material that conforms to irregular, convex or concave surfaces.
Mounting tip – vernier positioning: Ideally position the vernier triangle between 10 and 11, with the two speckled bands visible on either side. This centers the sliding arm. Do not try to align the vernier triangle If the initial crack is narrow and you want to maximise opening detection, you can move the vernier closer to zero.
Note: The G1 gauge does not measure movement along the Y-axis. For bi-axial monitoring, use the G6 gauge. | ||||
How to measure crack in angle?New G1 models (from mid-2025 onwards) feature a grooved bending line on the slider, allowing corner mounting without additional accessories.
For earlier models, G1 gauges are supplied with a foldable bracket designed for corner installation. This part has a thin section that guides the fold. Alternatively, an aluminium angle bracket (sold separately) can be used for corner installation. Various configurations include:
| ||||
How to protect the G1 crack monitor?
G1 gauges installed in public or high-traffic areas (schools, shops, streets…) may be subject to damage (tearing, graffiti, etc.). To protect the gauge, a UV-resistant protective cover is available. It is installed using the provided drive anchors or self-tapping screws. In high-risk areas, the removable E1 crackmeter with transparent mounting plates is recommended. After measurement, only the plates remain fixed to the wall, preventing damage to the gauge body. | ||||
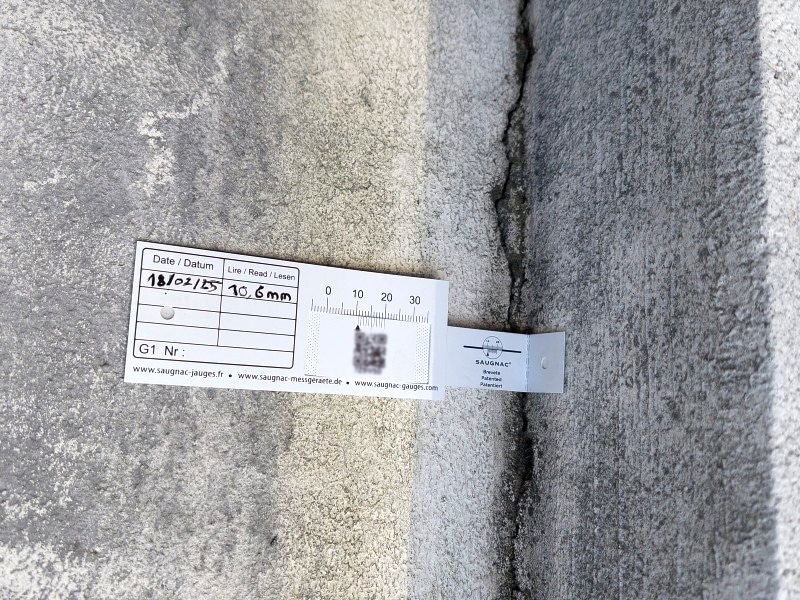
How to read the G1 crack monitor?The top scale is graduated in millimetres from 0 to 30 – this is the main measurement scale. The lower scale is a vernier, allowing readings to the nearest tenth of a millimetre (10 vernier divisions = 9 mm on the main scale).
Reading a measurement a) Millimeters: The pointer  b) Reading the decimal: Find the line on the vernier which is exactly aligned to a line on the measurement scale. In this example, graduation 8 on the vernier is in line with graduation 21 on the measurement scale. The decimal reading is thus 8/10th of a mm. The total reading is therefore 13,8 mm. ✅ You can also use the free Saugnac app to automatically read the gauge. 🔍 For even easier and more precise readings, consider the G1+ gauge (direct reading) or the E1 gauge (digital reading). | ||||
Download the Saugnac.app application to monitor your measurementsThe free web application Saugnac.app, available on PC and smartphones (https://saugnac.app), offers:
– Identification of each gauge and measurement using its unique QR code Find all the explanations on how the application works | ||||
Download monitoring Excel file
This user-friendly file allows tracking of up to 10 gauges per site or project by duplicating a sheet for each location. The file accounts for the thermal expansion coefficient of the gauge body and the sliding arm, automatically adjusting each reading based on the temperature difference from the initial measurement. Note that the impact of the expansion coefficient on the G1 gauge measurement is very small (about 9 micrometers every 1°C).
|

Protection with anti-UV for G1 gauges fixed outside (delivered with impact anchors)

Fast-curing epoxy adhesive in a twin-syringe for reinforced bonding in cases of significant surface roughness or high moisture

Mechanical fixing kit for surfaces unsuitable for self-adhesive installation (includes 1 drill bit + 1 PZ1/PZ2 screwdriver + 40 wall plugs and screws)

Bag of 50 anchors and screws for mechanical fixing on surfaces unsuitable for self-adhesive mounting

For measuring the variation in a crack in a vertical or horizontal internal angle (with self-adhesive tabs and 1 impact anchor).