


You want information for
G1+ Gauge
If you would like a quotation or have any questions about the product, please contact us:
- by email at info@saugnac-gauges.com
- by telephone on +33 9 62 07 18 68


Technical specifications
| ||
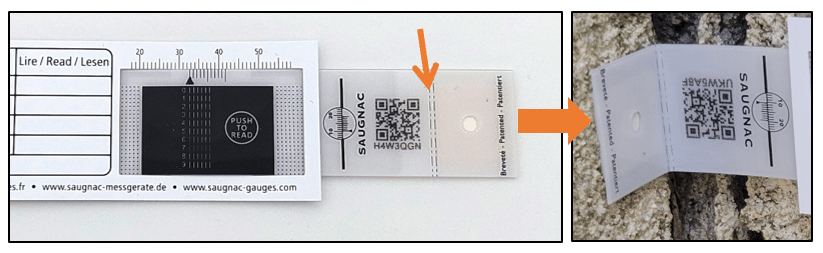
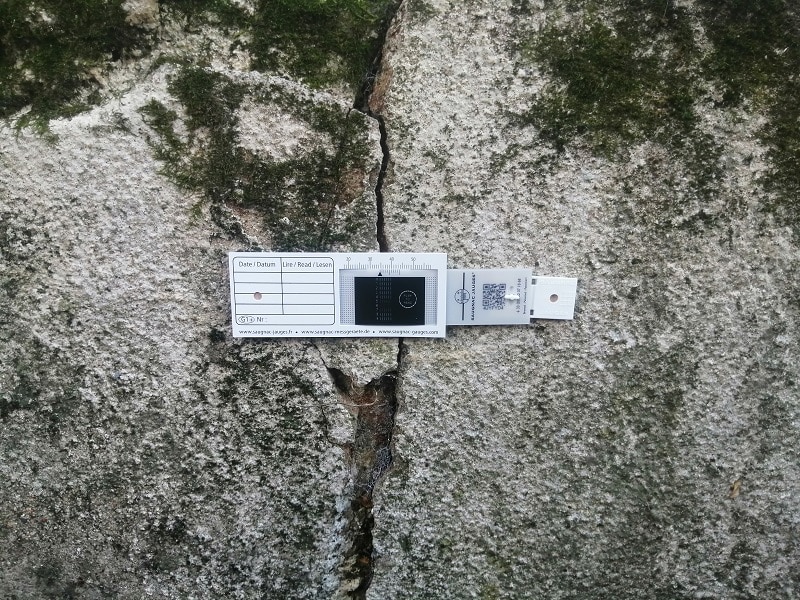
How to fix the G1+ crack monitorFor the most accurate monitoring, attach the crack monitor at the widest point of the crack, typically in the middle. The G1+ gauge is made of flexible material that adapts to irregular, convex, or concave surfaces. Two fixing methods are possible:
| ||
Installation tipsPosition the crack monitor where the crack is widest. It can be placed across vertical, horizontal, or oblique cracks. The flexible G1+ gauge follows the surface movement accurately.
| ||
Measuring cracks in cornersThe latest G1+ gauges (from mid-2025) have a groove marked on the folding tab to facilitate corner mounting without extra accessories. Earlier versions include a foldable tab with a thin section to guide bending.
Example corner installations:
| ||
Protecting your G1+ gauge
For high-traffic zones, use the removable E1 crackmeter with transparent plates. Only the plates remain on the structure after measurement, preventing damage. | ||
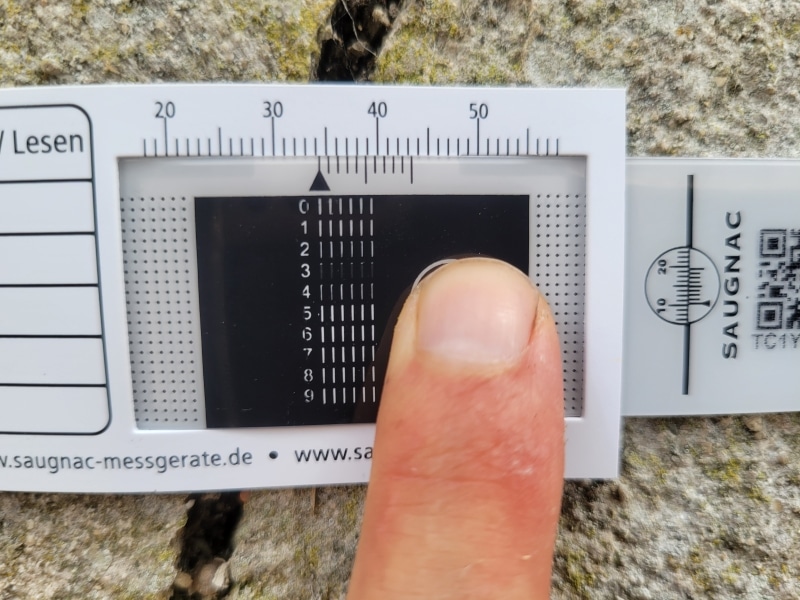
Reading the G1+ digital crack monitorThe G1+ gauge provides a digital readout in tenths of mm. Each 1/10 mm movement of the tab blocks a row of 6 white lights corresponding to digits 0–9. Subtract the first reading from the second to determine crack growth.
Crack growth over 90 days = 0.55 mm. Use the vernier if verification is needed (instructions in G1 product sheet). | ||
Download Saugnac.appFree PC and smartphone application at https://saugnac.app. Features:
Full instructions: how the app works | ||
Download Excel monitoring file
Use the Excel file to track up to 10 gauges per site. The file adjusts measurements for temperature-related expansion. If no temperature reading is available, leave blank. Note: Expansion effect on G1+ readings is very small (~9 µm per 1°C). |

Protection with anti-UV for G1 gauges fixed outside (delivered with impact anchors)

Fast-curing epoxy adhesive in a twin-syringe for reinforced bonding in cases of significant surface roughness or high moisture

Mechanical fixing kit for surfaces unsuitable for self-adhesive installation (includes 1 drill bit + 1 PZ1/PZ2 screwdriver + 40 wall plugs and screws)

Bag of 50 anchors and screws for mechanical fixing on surfaces unsuitable for self-adhesive mounting

For measuring the variation in a crack in a vertical or horizontal internal angle (with self-adhesive tabs and 1 impact anchor).